Tag Archives: Scrapbooking

finishing things off

24 Mar

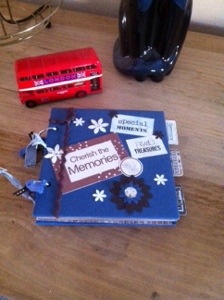
Whilst decluttering my craft stuff a while ago I came across several unfinished projects – shock – horror – gasp – namely a few scrapbook albums that I had started in earnest then just forgot about or more likely found something newer and more exciting to make! So I pulled a few out of the stack and got stuck in.

20140206-074541.jpg

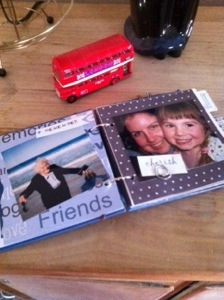
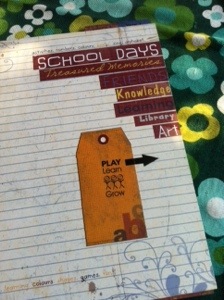
So far I’ve finished a mini family album to about 95%, just need to print out two more photos and I’m 70% done on my school album. Here’s a peek at both…

20140206-074849.jpg

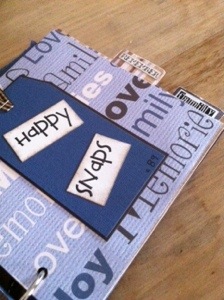
20140206-075115.jpg

This album is far from glamorous or fully embellished but I’m happy that it’s practically done and that’s what matters (to me anyway). It’s nice to have something to pick up and flick through.

20140206-075443.jpg

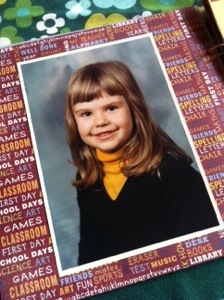
And here’s a lovely photo of a very cute girl…me!

20140206-075627.jpg

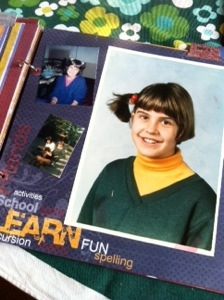
who then went through a thoroughly dorky stage…

20140206-075803.jpg

Did you have any wild hair styles when you were a young teenager? I really did think I looked fabulous. Erh-hem.

Craft Organisation ~ Scrap Paper

28 Jul

I’ve been loosely following Home Storage Solutions 101 52 Week Challenge and last week it was craft organisation.  Since I have so many craft supplies for various types of crafts I’m taking a bit longer than the one week period and though I would do some posts along the way – on the off chance it might help someone else with some sorting and storage ideas!

IMG_1379

So the first thing I got stuck into decluttering was my scrap paper stash.  I pulled it all out and discovered that after punching shapes or die cutting I just tossed the odd shape scrap back into the folder.  This meant that when I wanted to quickly grab a bit of paper it got snagged and damaged the other scraps or I found I had a smaller piece than I initially thought because there were bits punched out all over the place.  All this adds up to wasting time and mounting frustration so I thought enough is enough.  I got all the scraps out and neatly trimmed the pieces, cutting off any punched sections or odd shapes.  Oh and i vowed in future to neaten scraps before adding them to my stash.  I also tossed a few of the tiny plain coloured paper/card as really, how many one inch pieces does a person need?

IMG_1382

So that was part one – decluttering done, yay.  Next up was organisation/storage which was a breeze as I’d found a new system a little while back and it works really well for me.  It’s basically a file container with a lid.  You can find them in most office supply stores, I got mine from Officeworks and don’t quote me but I am sure it was under $20.  I have drop files inside with manilla folders for each type of scrap paper so I can quickly grab out a folder and open it out on my desk to see all my options.  To make it easier to find the bit of paper I need I use the following labels for my sections;

  • small patterned paper
  • large patterned paper
  • white, gray and black
  • ivory, brown and tan
  • green
  • red, pink and purple
  • blue
  • yellow and orange
  • images/off cuts/die cuts/embossing

IMG_1381

The small patterned paper is for really small bits, like under 3×2″ roughly, the large is for anything bigger than that.  I find this division is good as it stops the teeny bits getting lost and accumulating.  The colours are all plain card stock and the groupings work really well for my needs.   The last category is for those bits that might have stamped images on them or have been die cut and then not used.

IMG_1380

My scrap box lives under my craft desk on the floor because I need it handy but don’t want it crowding out my space.  With the handle in the lid it’s easy to pull out and fossick around in or lift onto my desk.  I like that this scrap storage is space limited so it means when things are getting squishy I know I need to start making more projects from my scraps.

Here’s a few other storage ideas for paper scraps.

DIY Scrap Paper Library | Damask Love Blog

A homemade scrap paper library like damask love’s, great for smaller scraps.

Magazine holders from a vegas girl at heart.  This is a great idea if you have the room for it, I love the way the colours and patterns look all out on display.

scrap paper storage

Neat and tidy draws from Amanda’s Scraproom.  I’m a big fan of labels.

So there’s a few ideas on how to tackle your scrap paper issues.  If you have a post like this on your blog please feel free to link to it in the comments, I like seeing how other people store their stuff, it gives me great inspiration.

Layouts in Minature

9 Jul

While on the craft retreat weekend I did two little layouts, that is – 6 x 6″. I like working in this size when you can crop or use smaller sized photos. You don’t have to worry about too much “white space” because you don’t have that much room!

20120709-140331.jpg
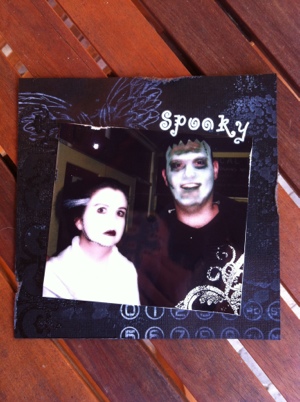
Do we look scary? This was taken at a friends fancy dress 40th. I blew out the white balance (I think that was what I did) to make it look more ghostly! The white stamping is actually picket fence distress stain, smeared on my craft matt then used like an inkpad with the stamp. I really like the effect on the black base. I did a little embossing right on the photo too, using a mix of black and white ep. Scandalous right?

20120709-140737.jpg
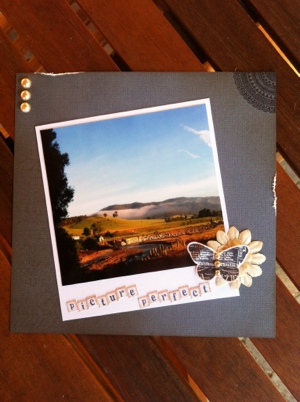
Can you believe this pic was taken with my iPhone? Not bad huh? I’ve just used some distress ink on the background and some new stamps from Pink Paislee.
Is anyone else a fan of 6 x 6″ scrapping?

Hog style scrappin’

29 Jun

First project for the weekend.

20120629-200816.jpg
Love these shades of pink and green, they make me happy. Distress inks used were worn lipstick and shabby shutters. There’s actually spirals stamped on the background but I don’t think it shows in the photo. I also got to use my new tape from Typo. Love that store.

improvements and finished layouts

5 Sep

Lately I’ve spent a bit of time tidying up those UFO’s (unfinished objects) and WIP’s (work in progress).  It so easy to get distracted when you are working on a craft project and never get back to it, or in most of my experiences, create a layout and never attach any photo’s to it!  This happens to me A LOT.  So a little while ago I dragged out all those half made layouts and finished them off once and for all.

This layout is from Kaszazz National Training Day in May.  These are our two crazy cats Scratchy and Clemantyne.  The photo on the left was taken with my mobile phone, I just love the composition.  Shots like these are flukes for me as I’m a pretty average photographer!

You may have seen these next few LO’s before as single pages.  I decided to add another page or in some cases; pocket pieces.  I did want to show people that you can still make the pocket pieces even if you don’t have that style of album – all you need to do is attach the pieces to a 12×12 base and viola!  This was a tip gleaned from May training.

Once I had finally finished off all these layouts I felt such a wonderful sense of achievement.  It was like they had been hanging over my head, always in the back of my mind as I job I HAD to do one day.

This layout was inspired by a Make and Take card.  I wanted to show how you can use ideas from one or the other.

Do you have any WIP’s or UFO’s lurking in the back of your craft room or are you a diligent crafter that completes everything that they start in a timely manner?  I’d love to hear any tips on how to get projects done from start to finish (without 6 months passing in between!).

Kris

Not a secret anymore…

29 May

Some big BIG news to share with you…

…….Kaszazz is bringing out their very own Die Cut Machine!

This is mega exciting as I have been humming and hawing about purchasing one for ages and now I will be able to get a Kaszazz one which means I can use it for workshops and demos.  We haven’t been given a release date yet but it’s definitely in the works and I think it may come out in the September release so start saving your pennies girls!  All I know about it is it’s a manual die cut machine that will take dies from all other manufacturers, it’s A4 size (huge) and it’s not one that is currently available in Australia.  I seriously cannot wait to see it.

If you are interested in finding out more about the Kaszazz Die Cut Machine please send an email to me at krismarr(at)iprimus(dot)com(dot)au and I will put you on a priority mailing list so as soon as I find anything out YOU will know about it straight away!

Open House Early Bird Prize – last chance!

17 Jan

Hi folks

Today is the last chance to enter the early bird RSVP draw for my open house.  Let me know by midnight tonight if you CAN come or if you CAN’T come and you will go in the draw for $35 worth of Kaszazz goodies.

More info on the open house can be found here.

It’s going to be a great day!

Kris

New Kaszazz Catalogue and Jan 2010 Release

12 Jan

Hi all

I have been trying to put a photo on here of the new catalogue for you but just couldn’t get it to work…until now!

NewCatalogueDec09 [640x480]

It’s pink and green and gorgeous!  I got my free copy a week ago and have been highlighting all the products I own so I don’t double up.  Whoa do I have a lot of Kaszazz items!

You can view the new catalogue on line now here or send me an email if you would like to order a copy, they are $5.95 plus postage.  If you are coming to my open house you can pick up a catalogue for just $4.00 or FREE if your order is $100 or over.

There is a great new section in the catalogue called The Colour Palette with lots of helpful information on all the different inks/paints/chalks and how to use them.  This is really handy as most of us buy inks then forget what they can be used with/on.

Oh and guess who has a project in the catalogue?  Yes meeeee!  I had a card in the last one and now I feel so chuffed that I have a (different) card in the new catalogue {pg 170}.  I love that Kaszazz consultants can design projects and have them published, it really makes you feel valued.

This Saturday is our National Team Training Day [NTTD] and more new products will be released, I’m so excited.  I will be heading over to Bendigo with Deanne and our team to join Julie’s team for a mega fun day!  Make sure to pop back next week for more info on the January New Release.

Happy scrappin’

Kris

Papercraft – Basic Tool Kit

10 Jan

Well folks the new year is already underway and what better time to start some new projects and try new crafts.  I hope to try lots of new things myself and have already begun with some art journal pages.  I will post the photos soon, a couple of them are swaps so I want to send them off first.  I really enjoyed it though at first it was hard not to “scrapbook” the pages if you know what I mean?  More on that later!  I thought I would do a little post today for any paper crafting newbies out there who have decided to give it a red hot go.  I’ve made a wee list to help guide you through setting up a basic tool kit.

I remember when I started out I pretty much had no idea what to buy and I spent a lot of money on things I didn’t really need.  I wish I’d had someone hand me a list of basic tools to help clear the confusion.  So I’m going to give you a quick run down on the tools that every paper crafter should own as well as a little explanation (in case you haven’t heard of them before).

Basic Tool Kit for Paper Crafters

Scissors – Paper and scissors go hand in hand really!  While you don’t need to spend a small fortune on scissors, steer clear of the real cheap ones as you’ll be using them a lot.  I find a smaller pair is great for papercraft and look for some with pointed tips for getting into corners.

Paper Trimmer – While you could start without one this tool makes light work of cutting clean, straight lines in sb paper and card stock and is definitely worth forking out for.  I have owned several paper trimmers in my time and my favorite by far is the EK Success Cutterpede rotary trimmer.  The rotary blade is the circular one and is usually a more expensive trimmer however the straight blades don’t seem to last very long and tend to tear the paper rather than cut it.  Oh and make sure your trimmer has measurements in both millimetres and inches, especially if you live where the metric system is in use!  Though traditionally only inches were used it’s becoming more and more common to find instructions in centimetres these days.  Don’t bother buying anything smaller than 12 x 12″, you will find it totally useless rather quickly.  Also the cheaper ones are often right on 12 inches long and you will find that occasionally scrapbooking papers are not perfect 12 x 12″ size so grab one that has a bit of extra space lengthwise.

Adhesives – Now this is where you can come unstuck (pardon the pun!) as there are so many tapes, glue and sticky things out there.  Make sure all your adhesives are acid free if you’re concerned about photo longevity (although a lot of modern crafters aren’t these days).

Double sided tape is essential, I’d recommend around 6mm wide and as clear as possible.  Try to get one that is re-positionable to some degree, trust me, it will happen!

I can’t go past Glossy Accents for it’s double duty; you can use it to adhere small things like flowers and rhinestones but it’s also fantastic used over the top of embellishments as a clear, hard laquer.

You can pick up acid free Glue Sticks for only a couple of bucks these days and they are very helpful for sticking down large pieces of sb paper as they won’t bubble and wet the paper.  Great if you want to do some off the page projects that involve covering chipboard.

A great way to add dimension is with a little double sided foam tape like Magic Mount.  It’s thick so will give whatever you are sticking some lift.  It’s fairly inexpensive and will give your projects more interest.

Craft Mat – You can pick up craft mats just about anywhere these days, just make sure that’s it’s self healing so if you cut into it this won’t affect future use.  A craft mat not only helps your projects by proving a firm, flat work surface but it will save tears when you realise you’ve cut into your dining table!  See below for another option.

Ruler – If you can pick up a cheap metal ruler with both inches and mills grab it!  It will be a really handy addition to your tool kit.  If not just use the ruler on your paper trimmer for now.

Pencil & Eraser – You probably already have these kicking around in a draw somewhere.  If you want to buy some especially for your kit grab a softer leaded pencil so that when you rub it out it hasn’t left score lines in your paper.  You might be able to find an eraser that works for pencil as well as adhesives; this is useful when you have to reposition something but it’s left a little gunk behind.

Black Gel Pen – these are the best for hand written journaling, you can write on photos with these to, as well as use them for doodling.

Hole Punch – Try and find a single hole punch at an office store (not the two hole punch they usually sell).  This tool is handy for making tags and punching holes for ring bound mini ablums.  See below for another option.

Stapler – I like the mini ones for attaching and embellishing, these are pretty cheap and can be found in discounts stores and chains.

Foam Sponge – These are great for ink distressing and a cheap alternative to ink blending tools.  Kaszazz has a nice one that you can cut into smaller pieces, they rinse out well and last for ages.

Nail File – Just one of those cheap cardboard ones will do.  A fantastic tool for distressing photos and papers.

So that is about all you will need to begin your paper crafting journey, however if you have some extra cash to splash check out the optional extras I’ve listed below.

Bone Scorer – Here’s a funny story; when I got my bone scorer in my consultant kit from Kaszazz I thought it was going to be one of the least used tools I’d ever own…Boy was I wrong!  I love my bone scorer and I don’t know how I lived without it.  This tool is indispensable for making cards and off the page projects.  What it does is help you make crisp, clean indents in the paper so you can fold or bend it without it becoming creased and horrible.  Use it with your metal ruler or for lots of measured scoring place your paper in your trimmer (keeping the blade out of the way at the bottom) and use the edged that your blade usually glides against to score.  Magic!

Craft Knife – A word of caution; don’t buy a cheap one as they can be very unsafe.  I like the Cutterbee as it has a retractable blade and you never have to touch the blades when changing them over ~ genius.  Always make sure your blade is sharp, putting a new one in at the start of a project is a good idea.  Just like kitchen knives, a dull blade is more dangerous than a sharp one!

Glass Mat – This is a fantastic alternative to the craft mat.  It will still protect your table top whilst allowing your craft knife to glide smoothly through paper.  It’s also great to use with your ink blending tool and easily wipes clean.  if you can’t find a good priced one try a glass chopping board from one of the cheap shops, just remember to grab a smooth one.

Eyelet Punch and Setter – If you love using brads and eyelets then get yourself a kit that has different size punches for making holes and the co-ordinating eyelet setters.  I like the Silent Setter or similar as you can do both jobs by just pushing down and twisting the handle rather than waking up the neighborhood hammering in your eyelets!

I’m not going to delve any further into tools as once you’ve got your basic kit sorted and you start completing your projects you will know yourself if there’s anything else you really need.  If you’re on a budget always think about a purchase and don’t rush into it, I’ve wasted many a pretty penny because “I just have it right now”.  Another idea is to attend crop nights as you will be able to borrow other peoples tools and test them out to see if they really are worth getting.

I hope this has helped any newbies out there, now go have some fun making stuff!

Kris

PS Stay tuned for more paper crafting tips coming soon – “how to not waste money and overstock your craft room”.

Swap-bot Mini Album

10 Nov

Here is the photo you have been waiting for patient readers!  It’s the mini album I made of my swap-bot goodies so far.

swapbot-album

I’ve used bits and pieces from my stash, recycled some things (the front and back covers came from a 6×6 album box) and added in things I’ve received in swaps like; postcards, sb papers, notes and pen pal letters, stickers, buttons etc.  I absolutely love it!  I’ve been wanting to make a mini album for ages that included all different size pages and was a bit eclectic and collagie (I know – not a real word).  It’s nice to be able to leave the album out to flick through every now and again and it’s a great way to display stuff you wouldn’t normally display.  I’m so happy with how it’s turned out so far and of course it’s a work in progress as I’ll keep adding things to it.  So what do you think?  Have you checked out swap-bot yet?  You know you really should – it’s totally awesome!

mwah

Kris